How to break circularity in our financial model
Circular models will not calculate. To avoid running the model in iterative calculation mode, we are going to break the circularity using a copy/paste macro.
We have to decide where is a good place to break the circularity.
Looking at the circularity diagrams we saw earlier, we can see that Tax paid is common to both circularities. Breaking circularity on Tax paid would therefore break both circularities in our model.
We will introduce a "copy/paste" macro that turns a calculated line into a hardcoded line to break the circularity. We then iterate the model until the calculated line and the hard-coded version of the line are equal.
Here's how to set this up.
Download the start model for this section:
To obtain the worked example file to accompany this chapter buy the financial modelling handbook.
Step 1: Set up & structure the Solve sheet.
I'm going to create a "Solve" sheet to do this. Although this is unnecessary with just one line item to iterate, it's a good structure that we can expand later if we have multiple line items solved by the model.
For example, in Project Finance, we often solve a price to hit a specific IRR while sizing debt to meet a target coverage ratio and breaking circularities in the model. Later material on Project Finance modelling will get into more detail on this.
I recommend structuring this sheet with three sections:
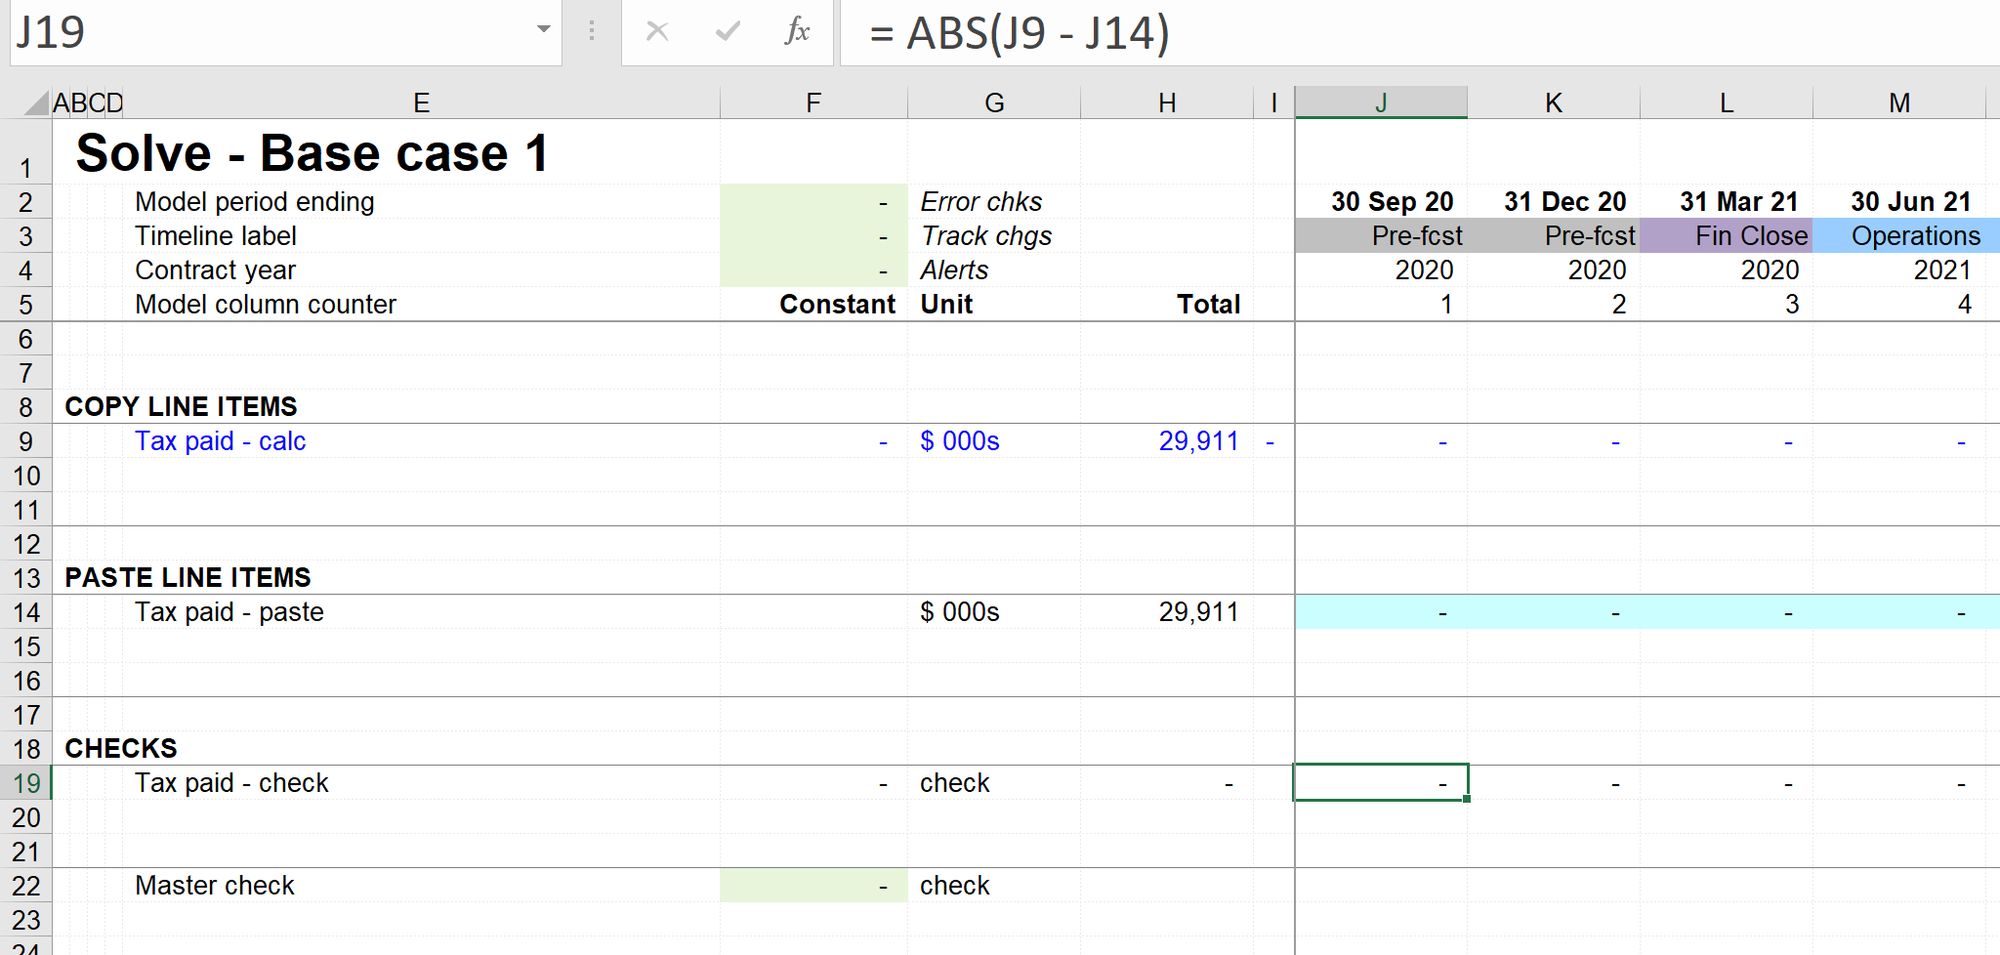
Copy line items.
In this block, we link to the line item calculation we want to break the circularity.
Paste line items.
In this block will be the hardcoded, "paste value" version of the line items. These are technically inputs but not inputs that we want users to change manually. They are inputs areas specifically for macros to use.
We reserve a specific light blue cell shading for "macro driven" inputs.
It's important that the copy block and paste block are exactly the same size.
Checks.
This block calculates the difference between the calculated lines and the "paste valued" lines.
As you're reviewing the downloadable solution file, note the following:
- When calculating the differences for the check lines, we use the ABS function. This returns the absolute value and ignores any sign. This is useful as sometimes values can cancel out and return a zero result.
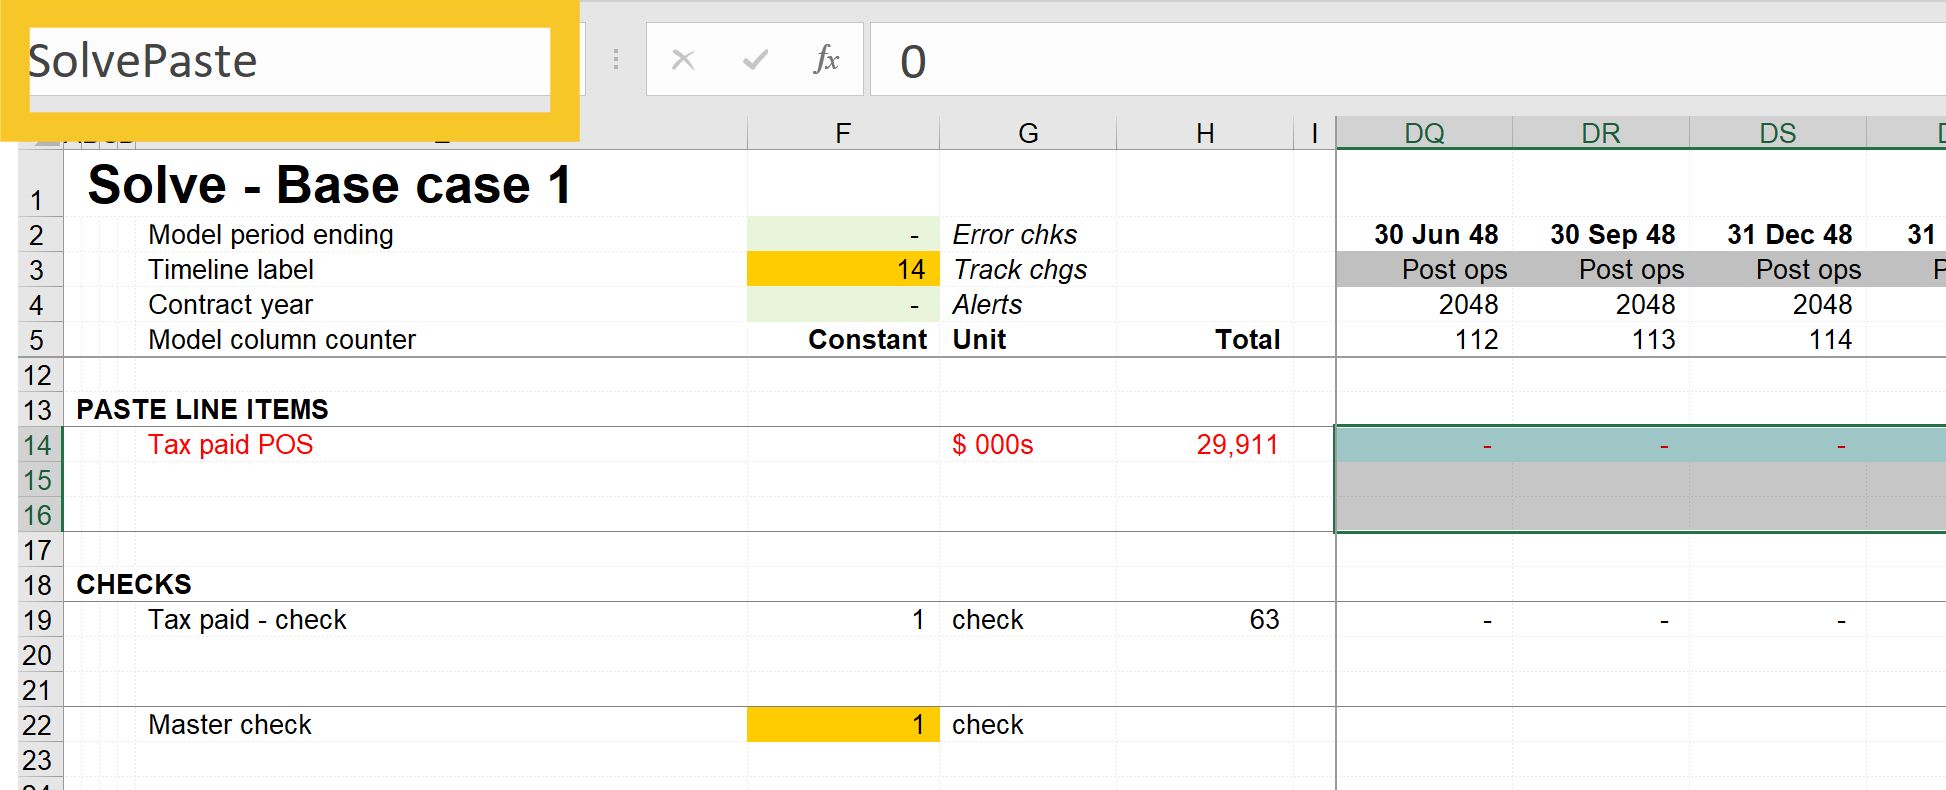
- In the "paste area," we will only paste from Column J onwards. The row total in row XX will be a live row total. It helps to see the row total of the pasted values.
- We calculate a single check in column F for each line of checks, which will activate if any time-based differences are too big.
- We use a named value "Chk_Tol" for check tolerance. Due to rounding, the model will sometimes not iterate to precisely zero difference. We want the check to "pass" when the difference is tolerably small.
- We calculate a single "master check", which is active if any of the checks are active. This check will go on to the check sheet.
Step 2: Wire the hardcoded version of Tax paid back into the model.
We will now link to the hardcoded version coming from our Solve sheet back into the tax sheet. We're sign switching that line then connecting it into the financial statements.

The circularity is broken, but now the calculated and the pasted values are different. We're now going to set up a macro that will iterate until the values are equal.
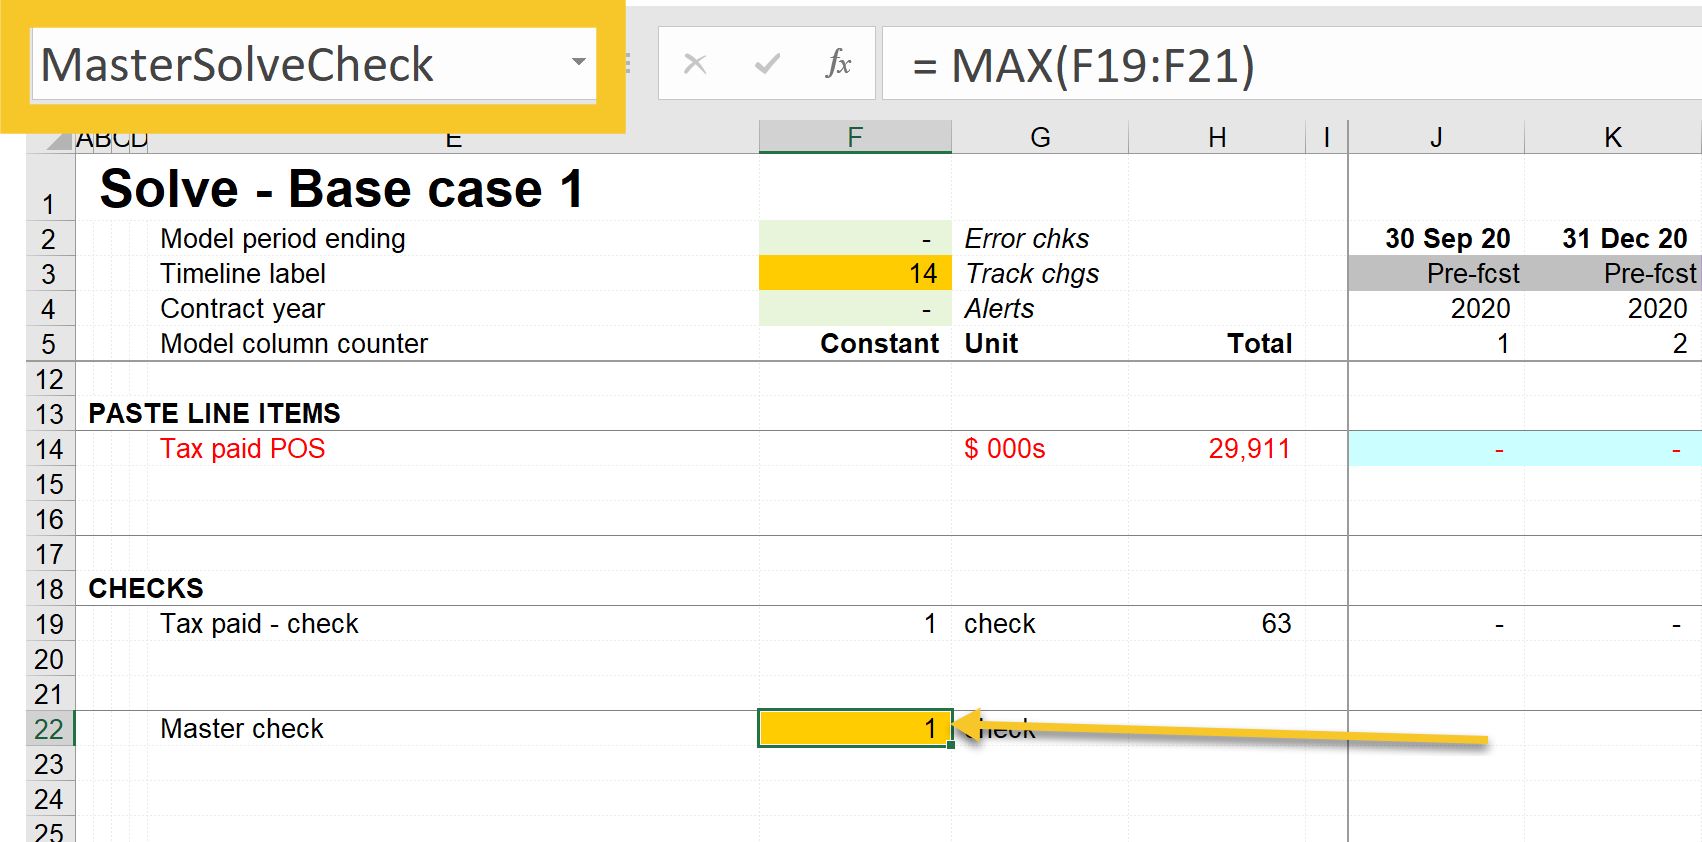
Step 3: Name the ranges.
As discussed in the chapter on Name Ranges, one of the use cases for naming cells is when we need to refer to those cells in macro code.
We are going to use three range names:
- SolveCopy
- SolvePaste
- MasterSolveCheck
To apply the names, first, select the ranges. Select the range from column J for the copy range and include a couple of spare rows. This allows us to add other line items to the solving mechanism later.
Then enter the name into the Named Range box in the top left of Excel.
The MasterSolveCheck name is applied to only one cell:
Now that we have the names set up, we can write the code.
We'll cover that in the next chapter.
Download the financial model complete to this point:
To obtain the worked example file to accompany this chapter buy the financial modelling handbook.
Comments
Sign in or become a Financial Modelling Handbook member to join the conversation.
Just enter your email below to get a log in link.