How to add a VBA macro to a financial model
To begin working with VBA in Excel, we need to have the developer tab active.
Download the start file for this section:
To obtain the worked example file to accompany this chapter buy the financial modelling handbook.
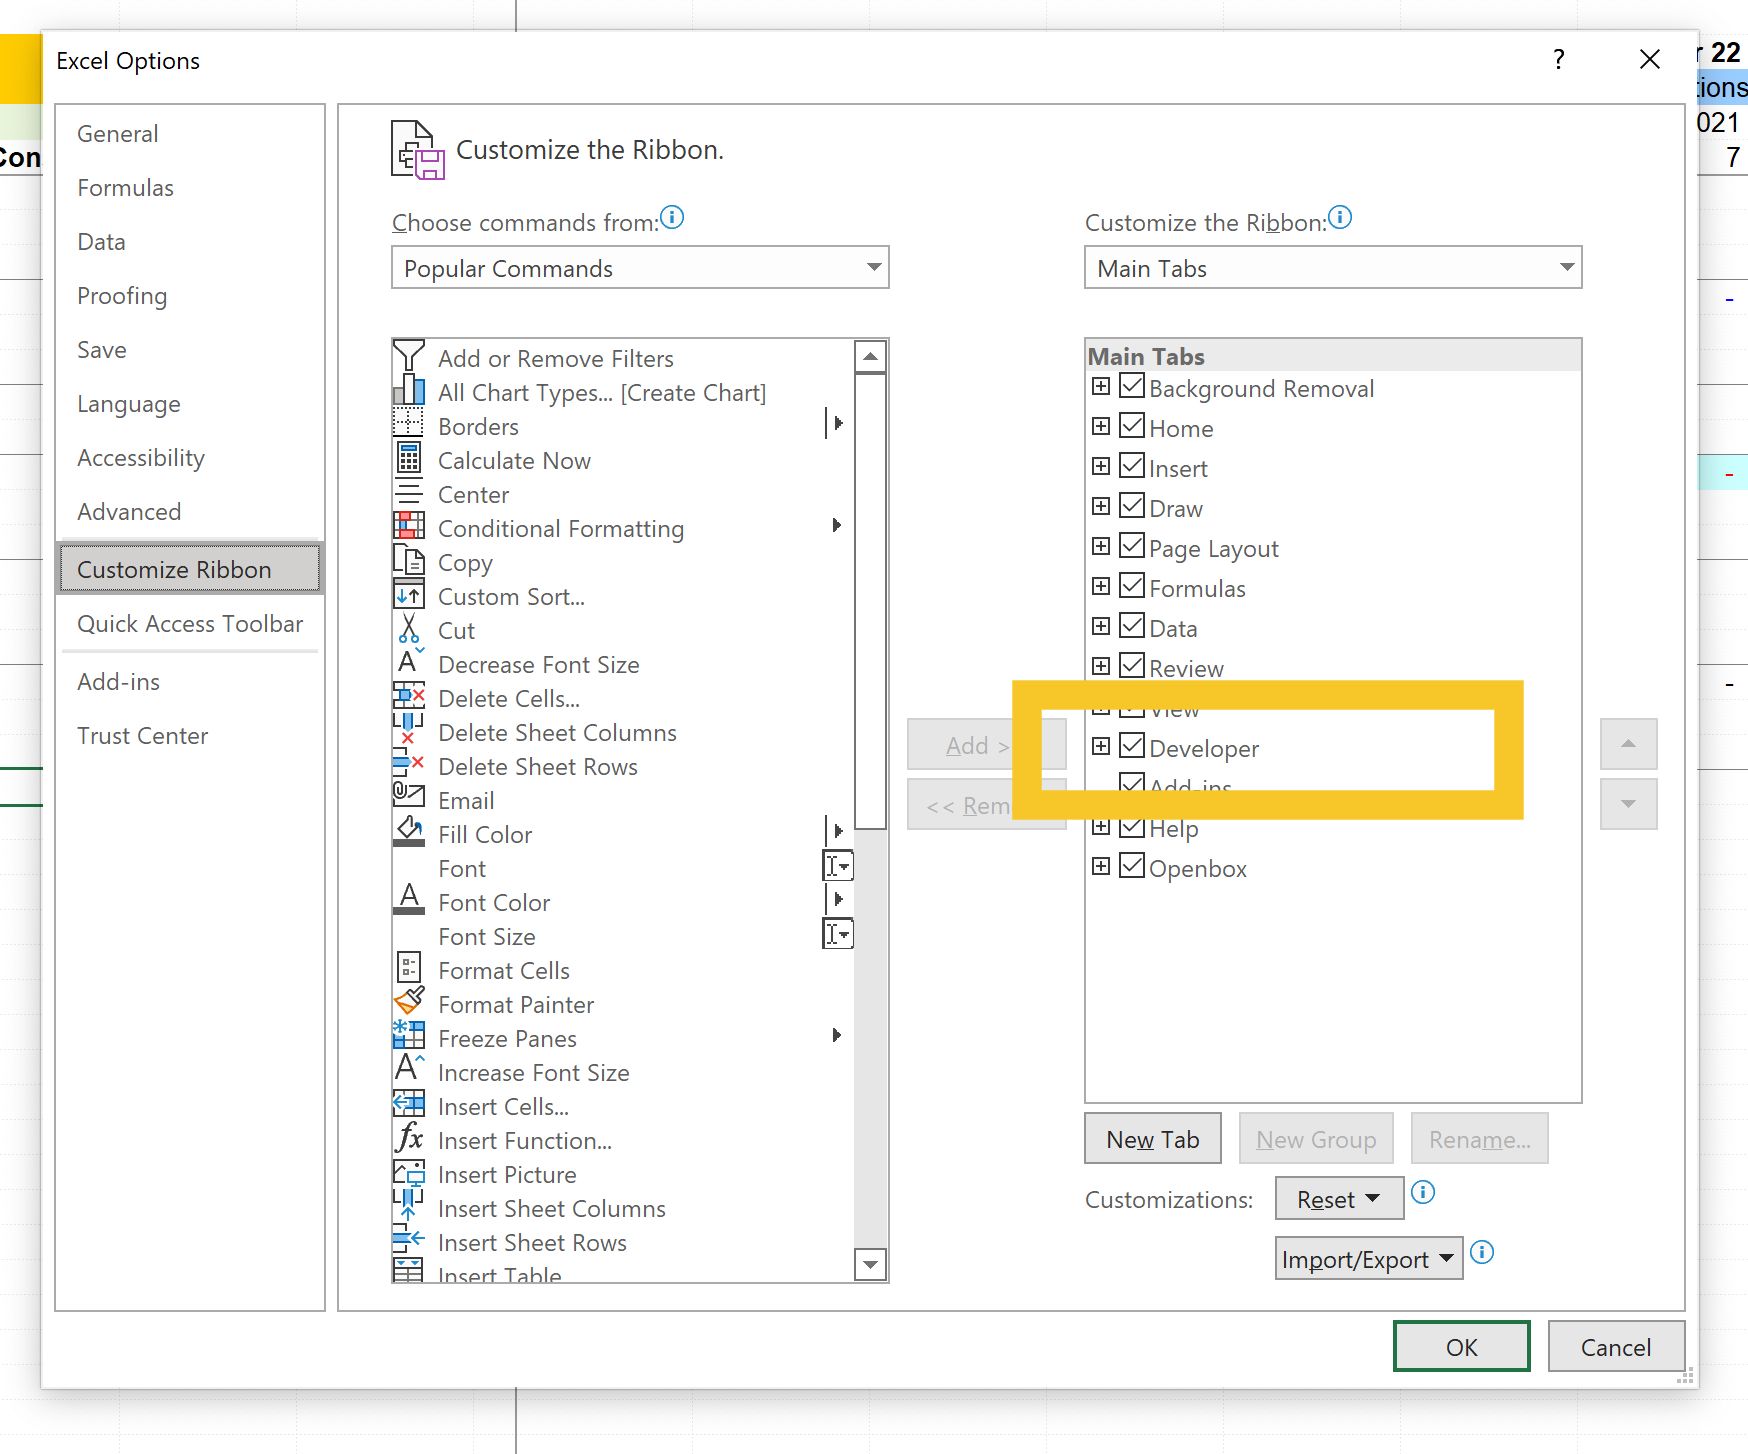
Go into File / Options / Customise ribbon - and tick Developer tab.
Once the developer tab is activated, we have a quick and easy way of adding a macro. Note - there are multiple other ways to do this - but I find this quick and straightforward.
With the Developer tab active, there is now a little button at the very bottom left of the screen.
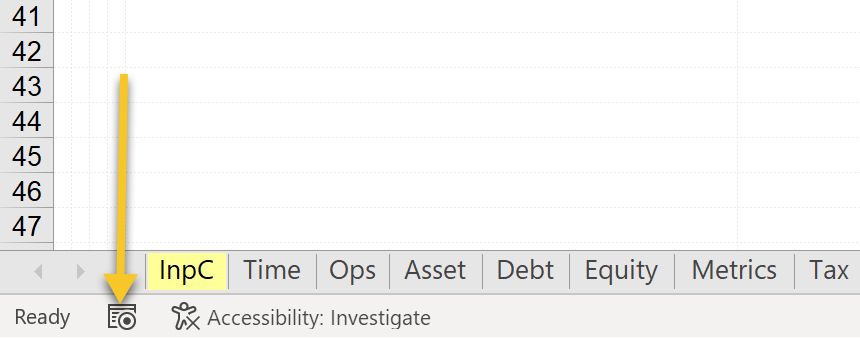
This will start a "record macro" operation. When this is active, everything you do next will be recorded and turned into VBA code. We will not "record" our steps - but this is just a quick way to add the macro containers.
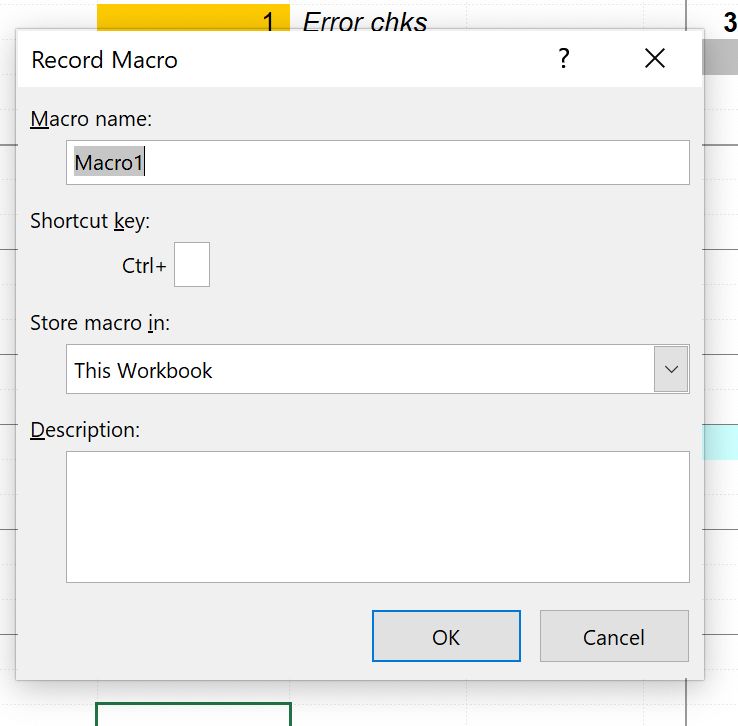
When we hit that button, we'll get a dialogue to name the macro. I'm calling this one "MasterSolve".
The record macro button is now a square. Pressing this now will stop the macro recording. We are going to immediately press this without doing anything else.
We have set up a macro "container" with no code in it.
To access the new macro code, hit Alt+F8.
You may initial see a lot of macros listed. This is because you see all the macros from the productivity pack. To simplify the view and get rid of all the productivity pack macros, choose "Macros in: This workbook". You will then see your new MasterSolve macro.
Hit edit. The VBA editor will open, allowing us to edit the code.
We are going to create a "Do Until" loop. This code causes Excel to repeat an action until a condition is satisfied.
Here's the code:
Sub MasterSolve()

Application.CalculateFull

Do Until Range("MasterSolveCheck").Value = 0

	Range("SolvePaste").Value = Range("SolveCopy").Value
	Application.CalculateFull

Loop

End Sub
Sub MasterSolve()
Let's break the code down step by step:
Step 1: Application.CalculateFull
Does a complete recalculation of Excel (the equivalent of Ctrl+Alt+F9)
Step 2: Do Until Range("MasterSolveCheck").Value = 0
Sets the condition that will cause the loop to stop. In our case, the loop should stop when the value in MasterSolveCheck = 0
Step 3: Range("SolvePaste").Value = Range("SolveCopy").Value
Sets the values in the range "SolvePaste" equal to the values in the range "Solve Copy". This is the same as doing a "Paste special: values".
Step 4: Loop
If the condition set by the Do Until command has not been met, the macro will loop again from the first command after the Do Until instruction.
This macro will paste the calculated line as hardcoded values, recalculate the model, and repaste again until the difference between the calculated and pasted values is small enough to be acceptable.
There are three ways to access the code again:
- Alt + F11
- Alt + F8, select the macro you want to edit and hit the Edit button.
- Click on edit code in the developer ribbon.
Next, we want to test the macro.
We will put it onto a button on the Solve sheet to make it easy to run.
Download the financial model complete to this point:
To obtain the worked example file to accompany this chapter buy the financial modelling handbook.
You'll have noticed that we can no longer save the file in the XLSX format.
So let's take a quick detour to discuss Excel file types.
Comments
Sign in or become a Financial Modelling Handbook member to join the conversation.
Just enter your email below to get a log in link.