Debt modelling 2: Straight-line principal repayment
Modelling the straight-line principal repayment of debt is like modelling straight-line depreciation.
Download the lesson start file:
To obtain the worked example file to accompany this chapter buy the financial modelling handbook.
Modelling the straight-line principal repayment of debt is like modelling straight-line depreciation.
So similar, in fact, that we can copy the same structures we used to model that.
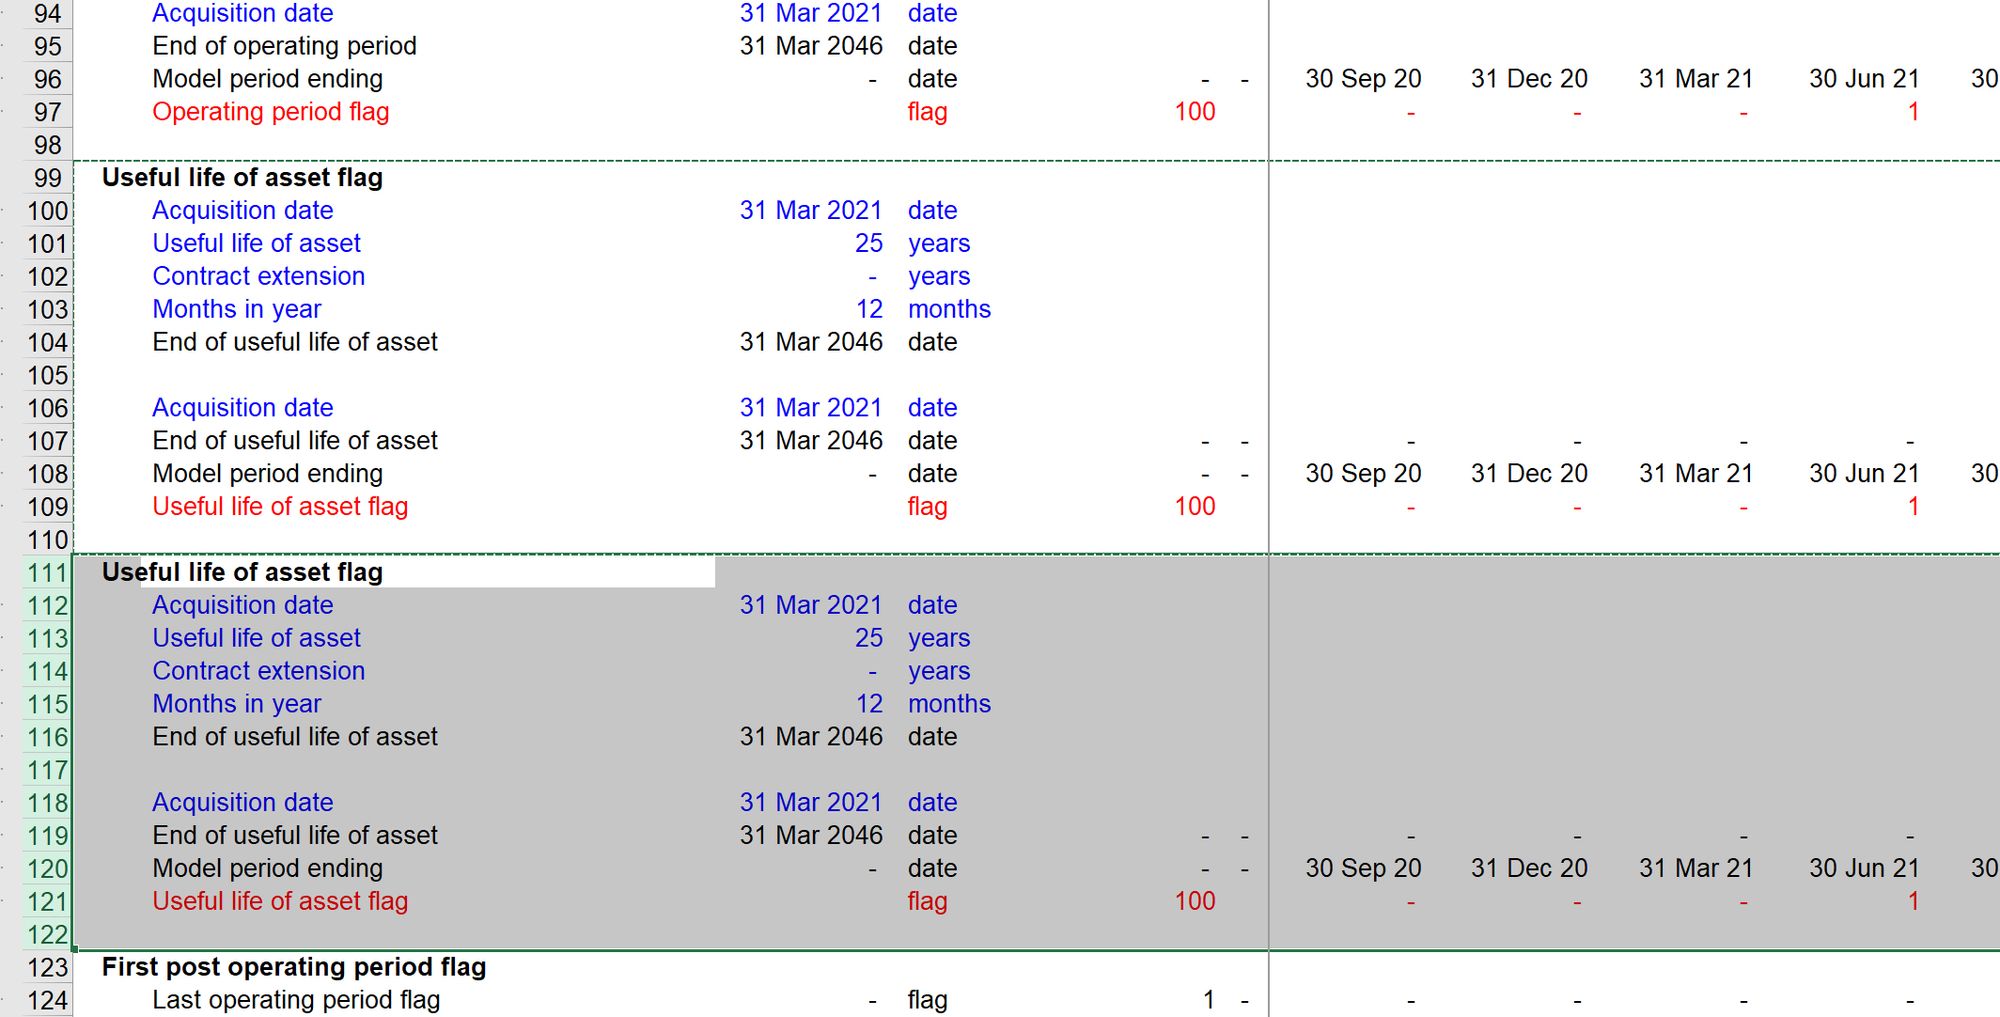
Step 1: Copy the Useful life of asset flag.
I used Ctrl+shift+= to insert the copied cells immediately below the Useful life of asset flag.
Step 2: Change the ingredients within the flag calculation & re-label where necessary
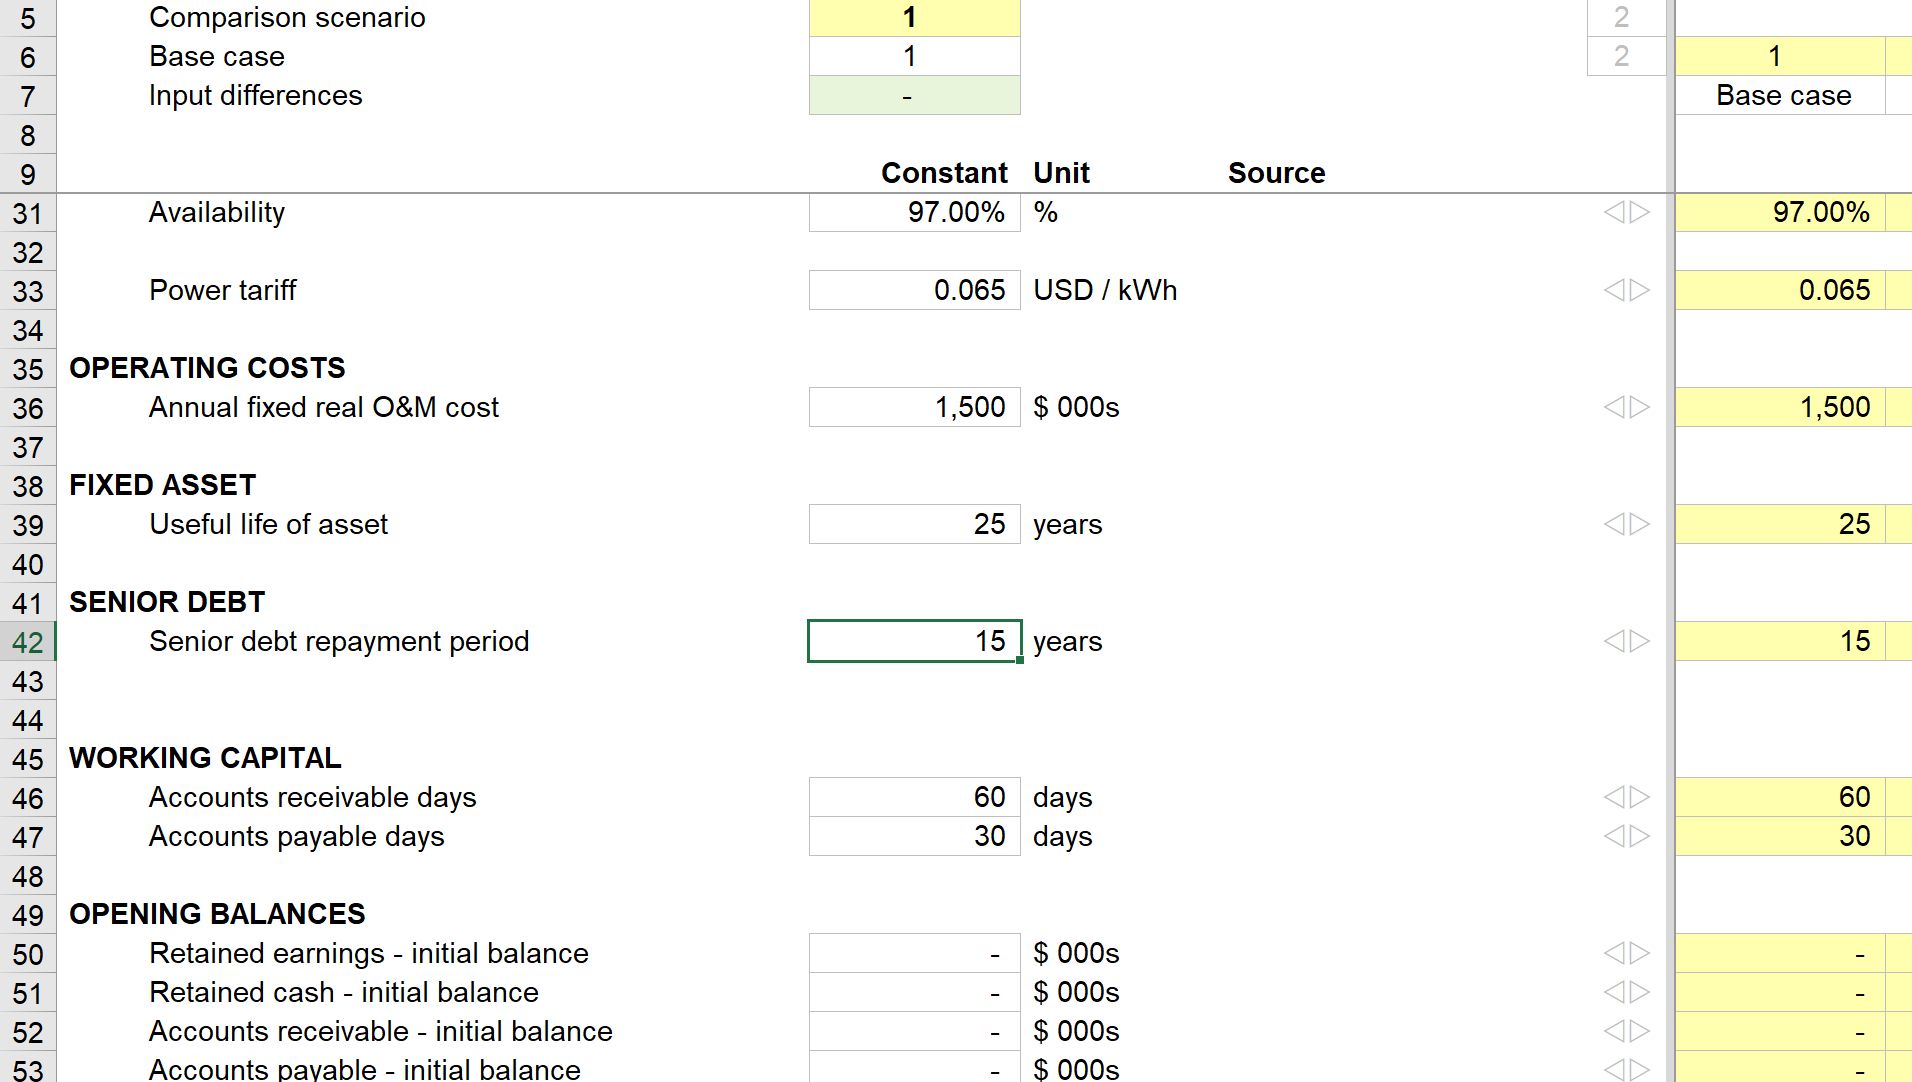
I need to swap out the "Useful life of asset" link with a "Senior debt repayment period" link. I, therefore, first create this on the input sheet.
We replace the Useful life of asset link, re-label the calculations, and relink the final debt repayment period date into the flag calculation block.

All using Skill 2 to create our links.
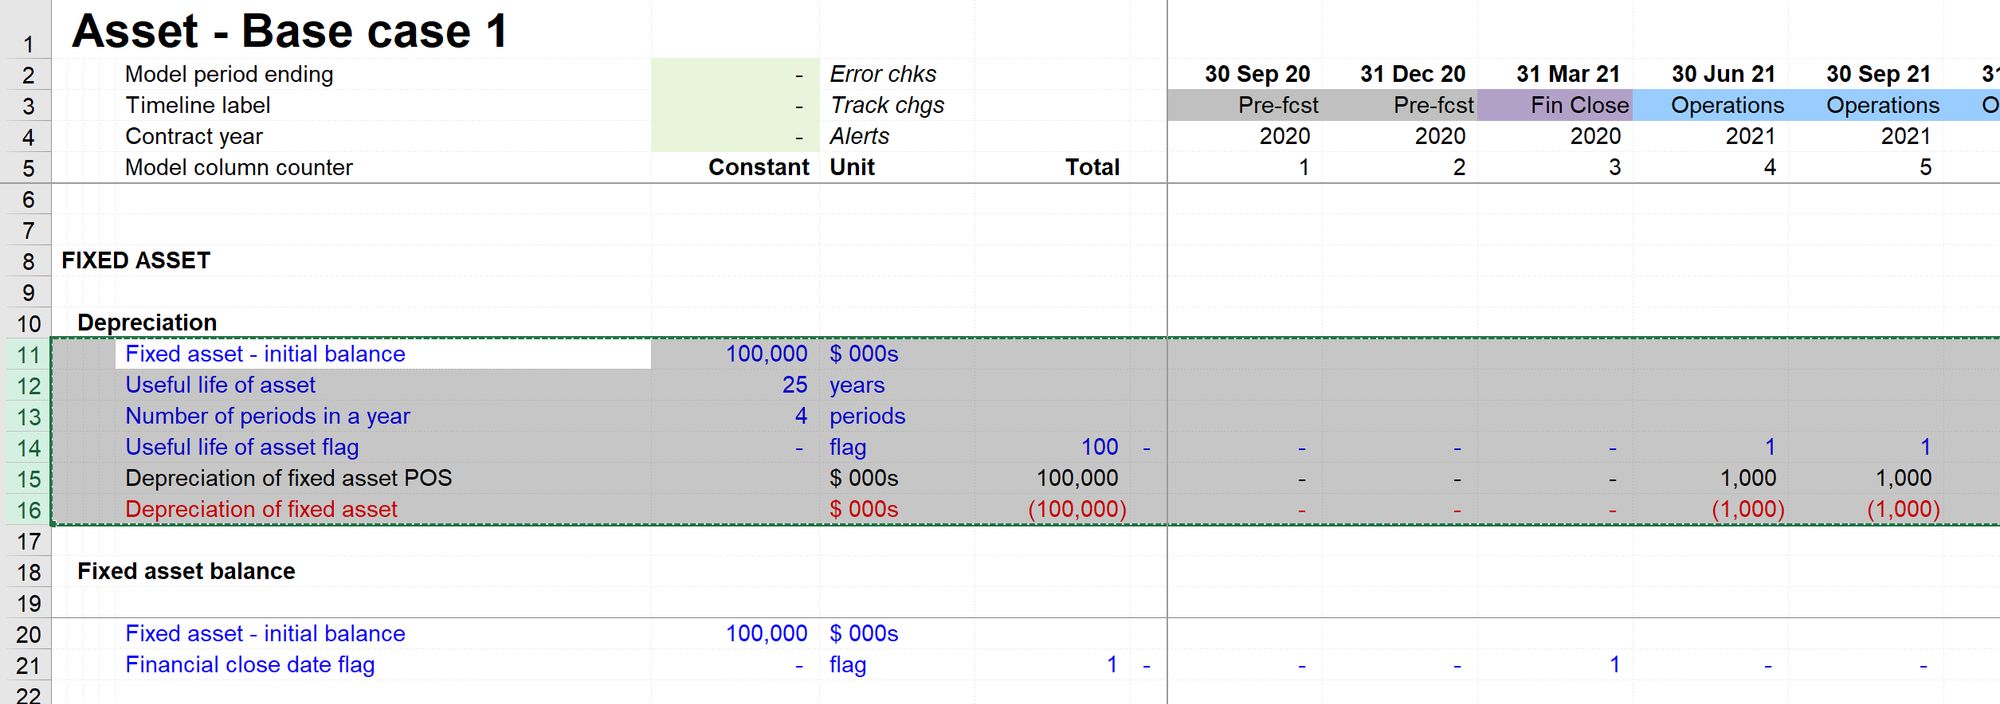
Step 3: Copy the depreciation calculations from the asset sheet.
Since the calculation structure is the same, we can reuse the block we have already created.
First copy the block on the asset sheet:
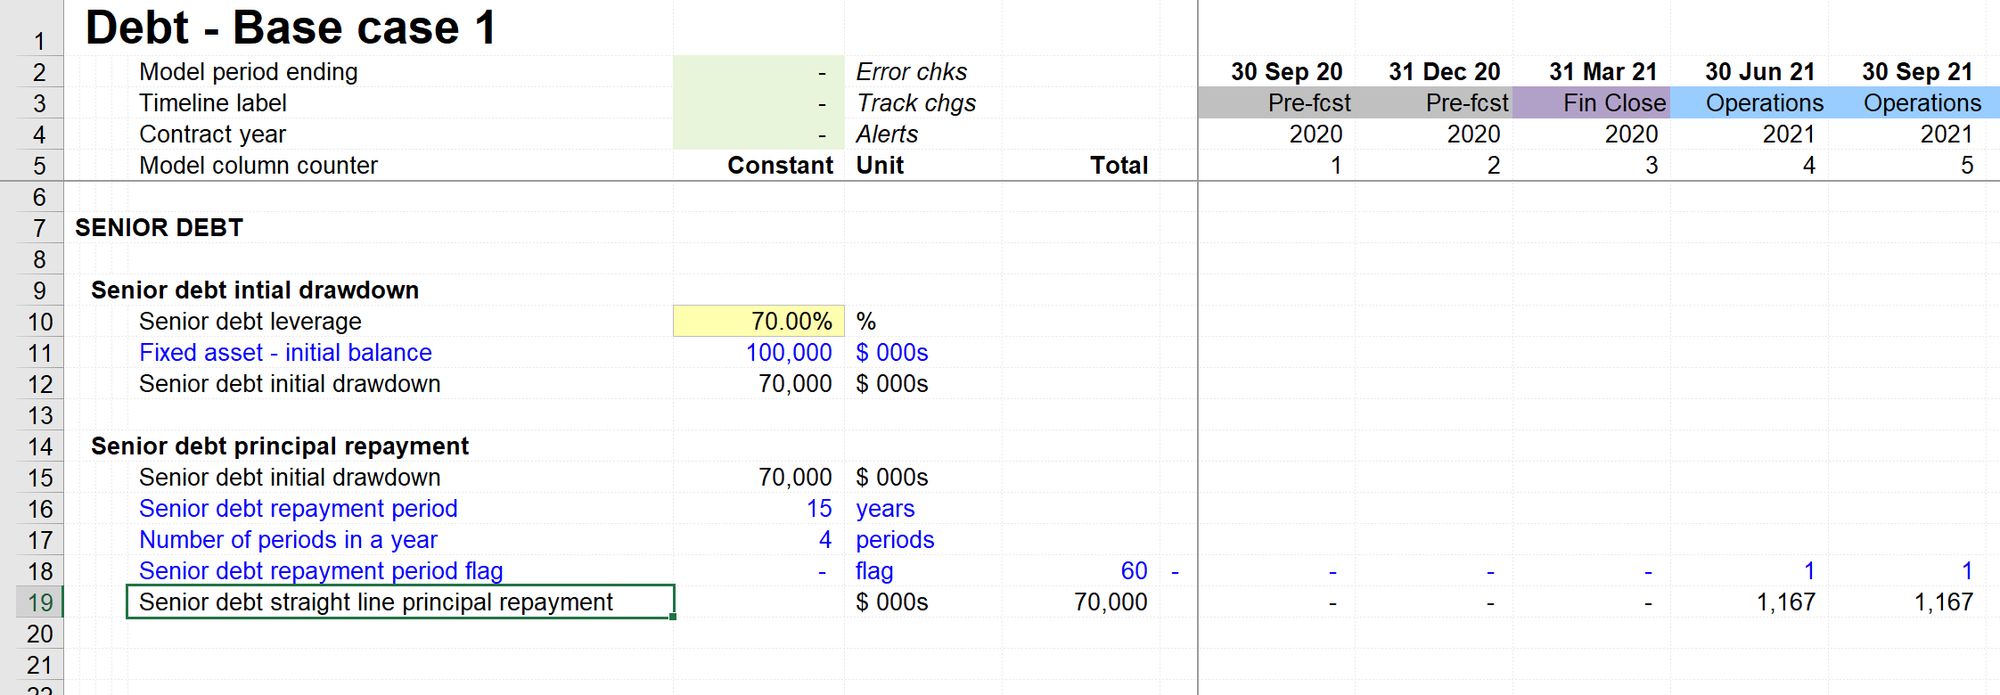
Then paste it onto our Debt sheet again.
Again I'm using Ctrl+Shift+= to insert the rows and move everything down the sheet.
All we need to do next is make a series of link replacements and then re-label the calculation to "Senior debt senior debt principal repayment."
I've deleted the sigh switch for now as I'm not ready to put this straight onto the financial statements.
We will look at three possible repayment profiles. I want to be able to switch between them easily.
I'm therefore adding a block with the straight-line profile and two placeholders. Using the INDEX function, I'm setting up this block to change the profile that's feeding through to the model.

There are multiple ways to achieve this using CHOOSE, OFFSET or an IF function. I prefer INDEX for this purpose as:
- it's simple and traceable and will return an error if I choose an impossible number (unlike OFFSET)
- its range will stretch if I add more rows (unlike CHOOSE or a nested IF)
- it's short (unlike a nested IF)
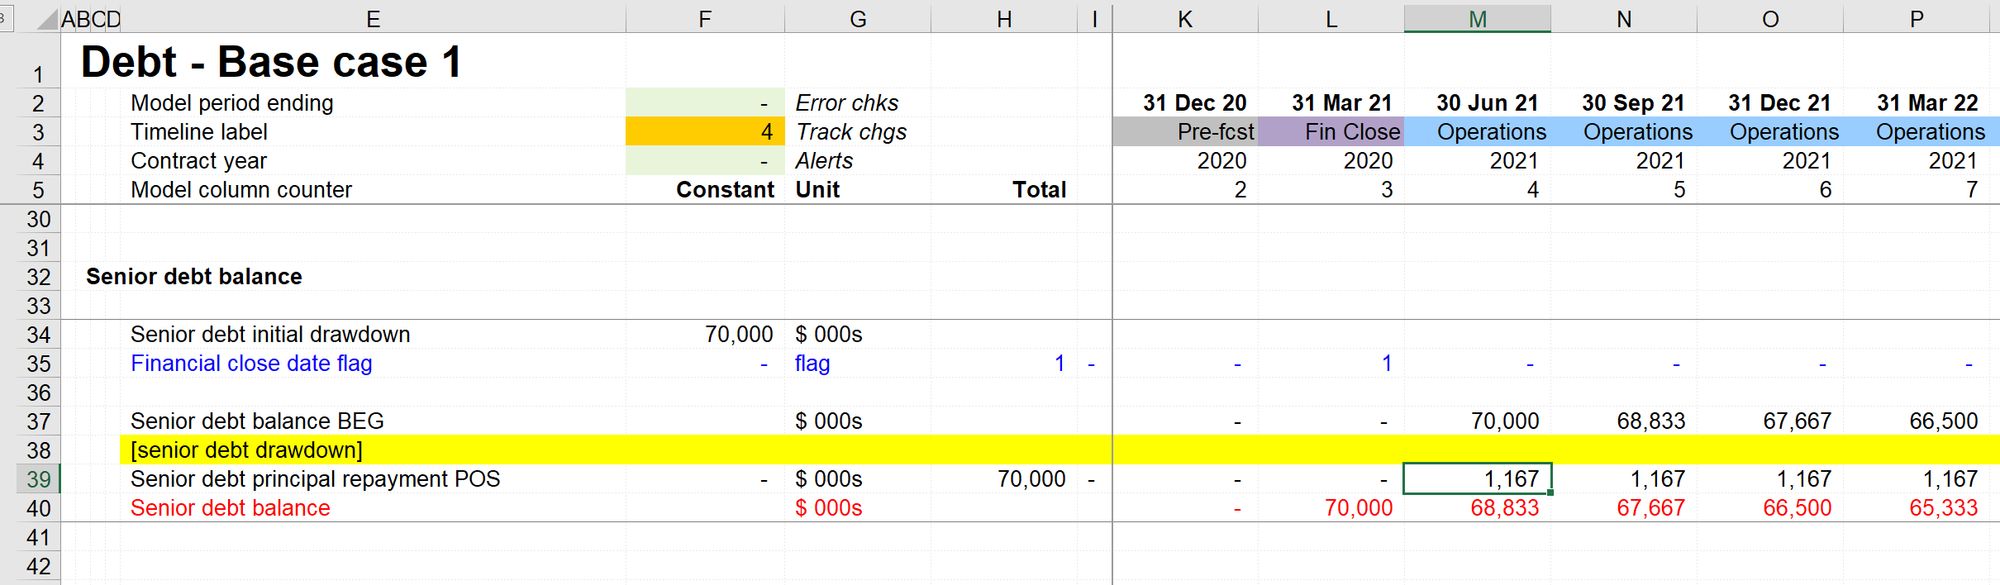
Step 4: Wire principal repayment into our model.
Principal repayment will affect both sides of our balance sheet:
- Linking principal repayment to our cash flow statement will reduce the amount of cash on the asset side of the balance sheet.
- Linking principal repayment to our senior debt balance will reduce the amount of debt on the liability side of our balance sheet.
Wiring the principal repayment into the cash flow causes error checks to activate since our balance sheet is no longer balancing.
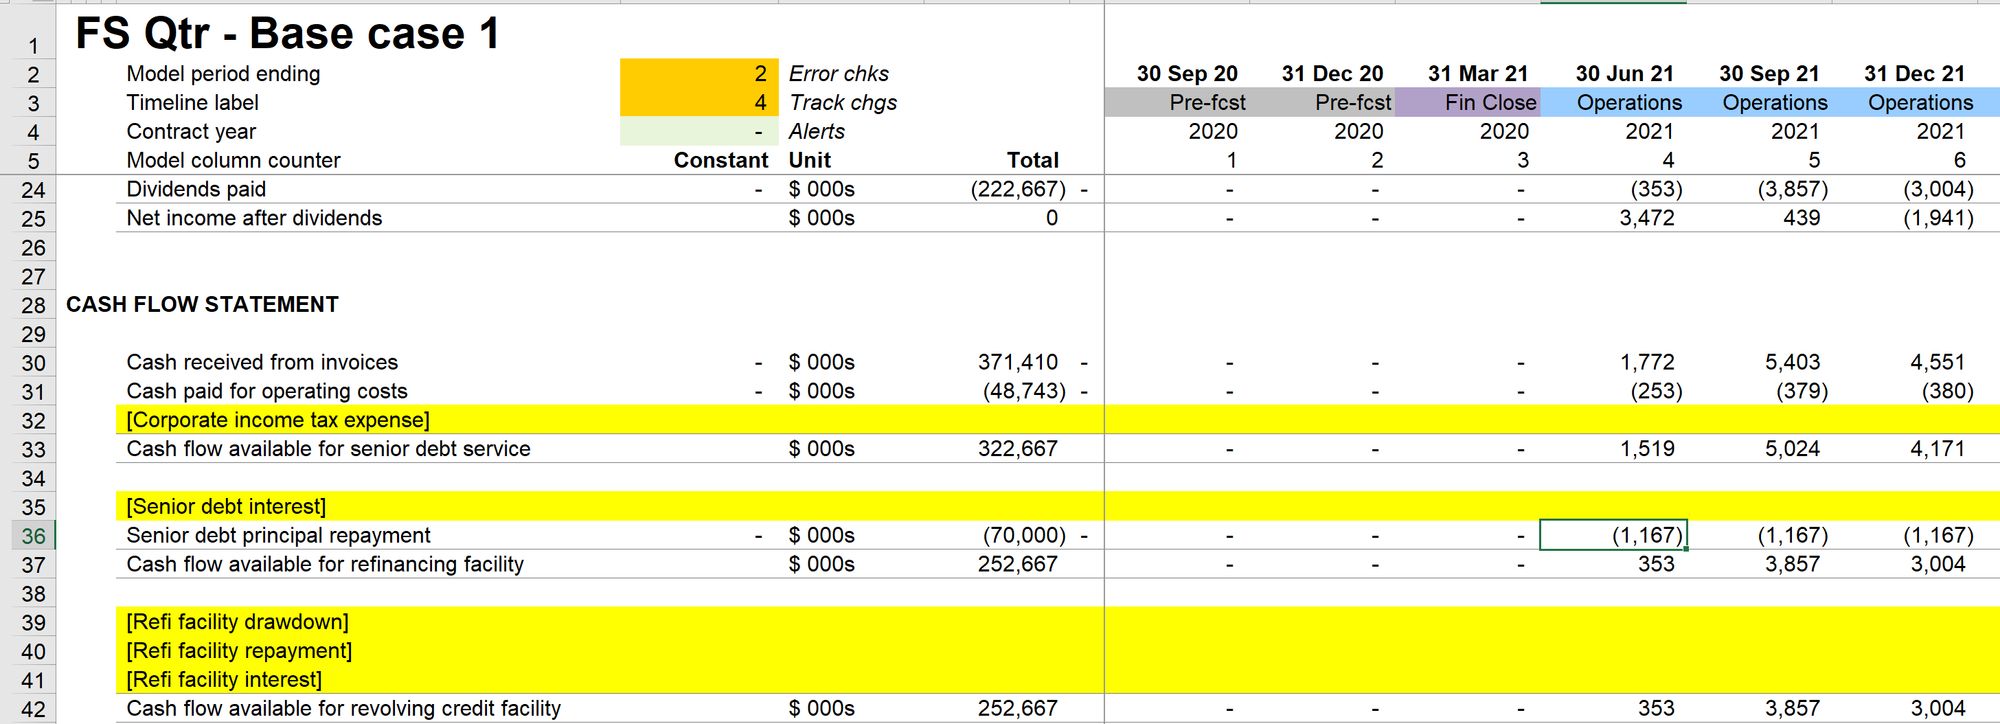
We sort this out quickly when we wire the principal repayment into the corkscrew and thereby reduce the liability side of the balance sheet by the same amount as we have reduced the asset side:
Step 5: As ever, run our section completion checklist.
Note: when running my section completion checklist, I noted the placeholder in the debt corkscrew. As this is not a "revolving" facility, there will not be further drawdowns of the debt facility. I have therefore removed the upward flow placeholder from the corkscrew:

Download the model completed to this point:
To obtain the worked example file to accompany this chapter buy the financial modelling handbook.

Comments
Sign in or become a Financial Modelling Handbook member to join the conversation.
Just enter your email below to get a log in link.