Core modelling skill 8: Adding a balance corkscrew
Download the reference file to practice:
To obtain the worked example file to accompany this chapter buy the financial modelling handbook.
Whenever we need to model a balance, we are generally going to use a corkscrew structure. Again, we strive to do things the same way each time, increasing efficiency and reducing error and thinking time.
There are two kinds of balance corkscrew, one that introduces an initial balance and one that doesn't.
Because all corkscrews are the same, we avoid building them from scratch each time.
We can either keep a template corkscrew on the Tmp sheet and copy it each time we need a new corkscrew. Or we can use the Productivity Pack automated corkscrew builder.
In the next section of the Handbook, we'll use this skill frequently as we build out the model step by step. For now, let's imagine that we are about to start modelling Accounts Receivable and need a balance corkscrew.
Option 1: Using the Productivity Pack corkscrew builder.
Step 1: Active the Productivity Pack dialogue.
This keystroke opens a dialogue box to access a series of Productivity Pack macros. These are less frequently used and so have been added to this dialogue rather than given their own direct keystroke.
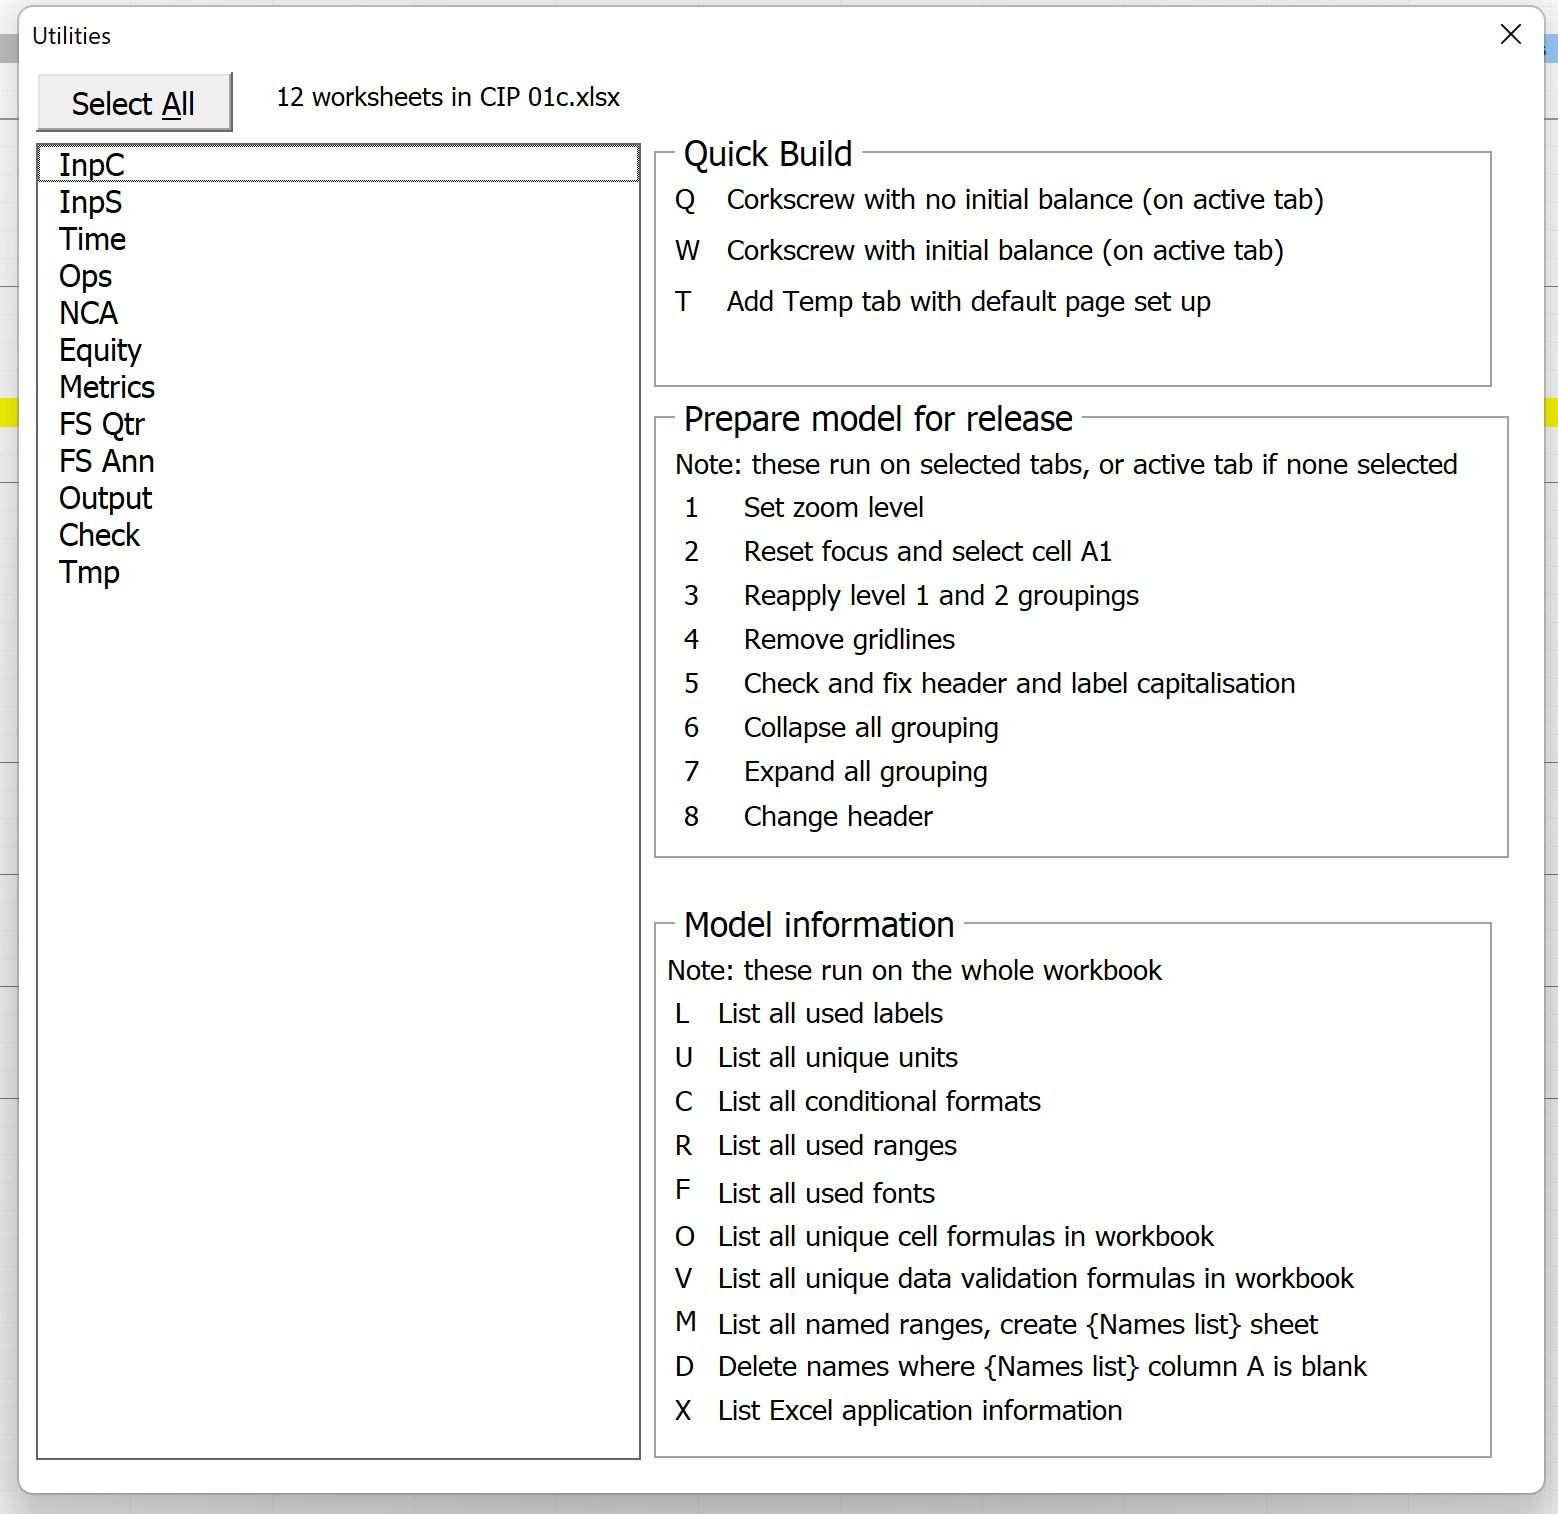
Step 2: Select which corkscrew structure you want.
In this instance, let's assume that we want a corkscrew with an initial balance. In this case, we'd press W.
Step 3: Name the corkscrew.
We'd want to name the Corkscrew "Accounts Receivable" in this example.
The macro will add the corkscrew to the active sheet when you hit enter.
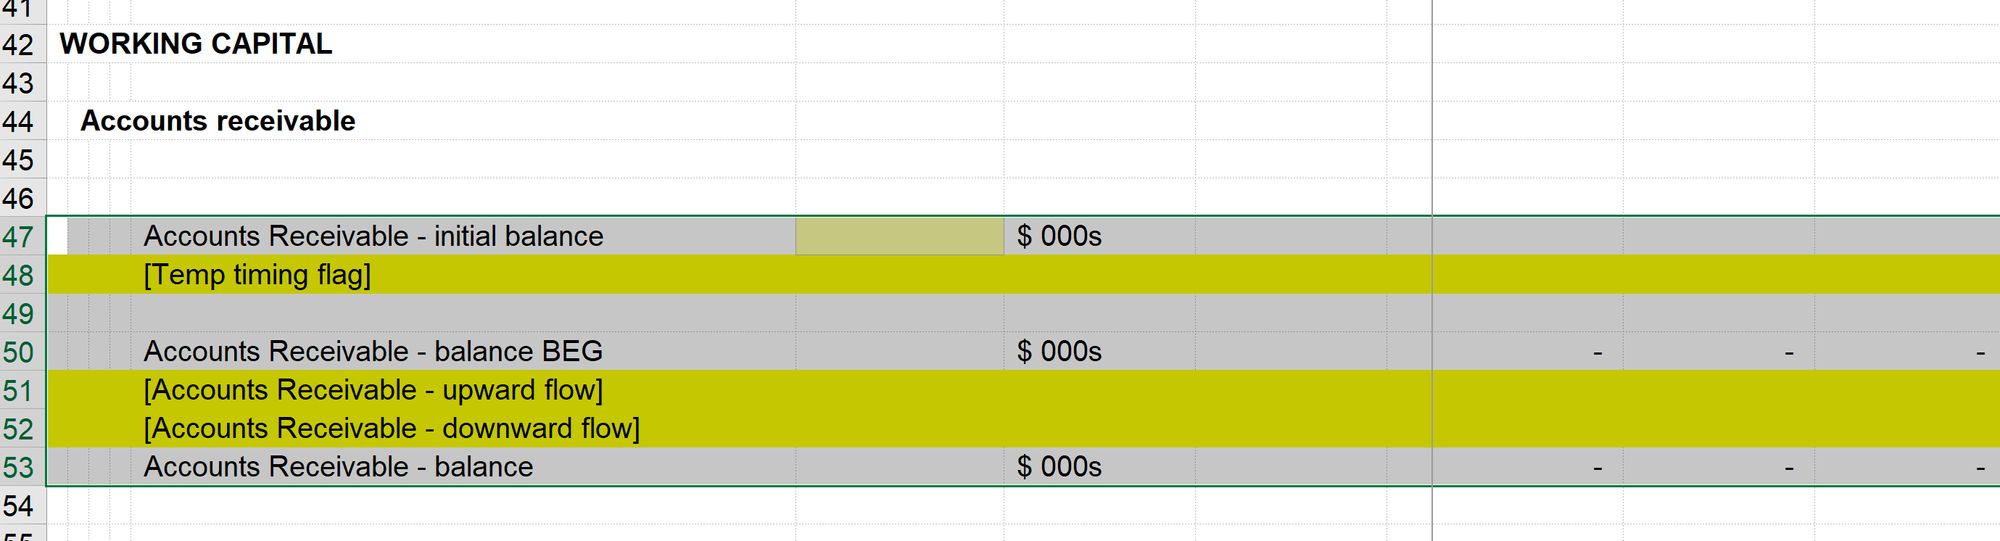
Step 4: Add the initial balance.
The corkscrew is set up with the initial balance as an input.
You can either input the value directly here and relocate it later (See Chapter X on relocating inputs). Or you can replace this with a link to an initial balance already on the input sheet.
In this example, we have linked to an Accounts Receivable balance on the input sheet.
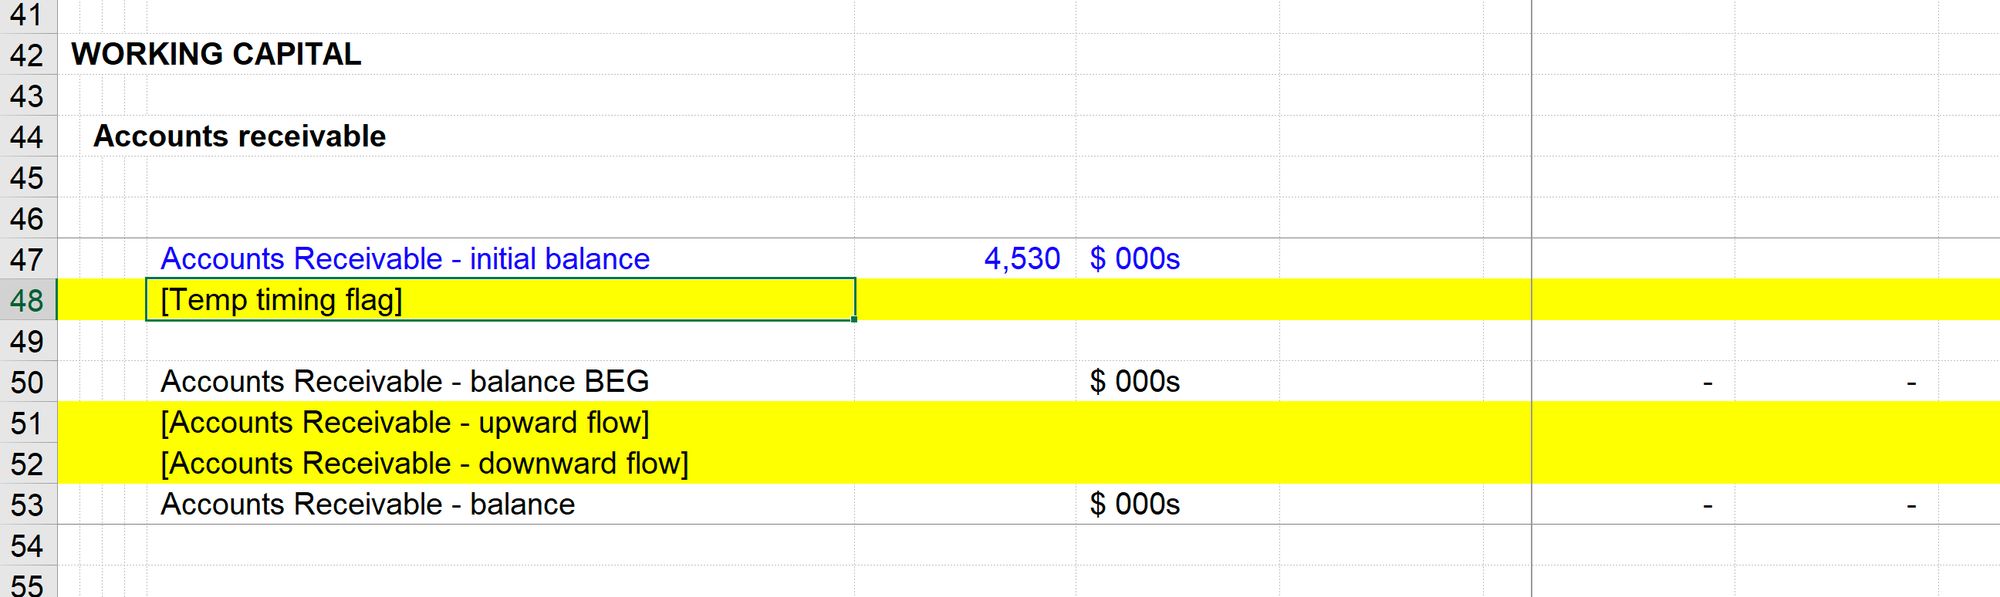
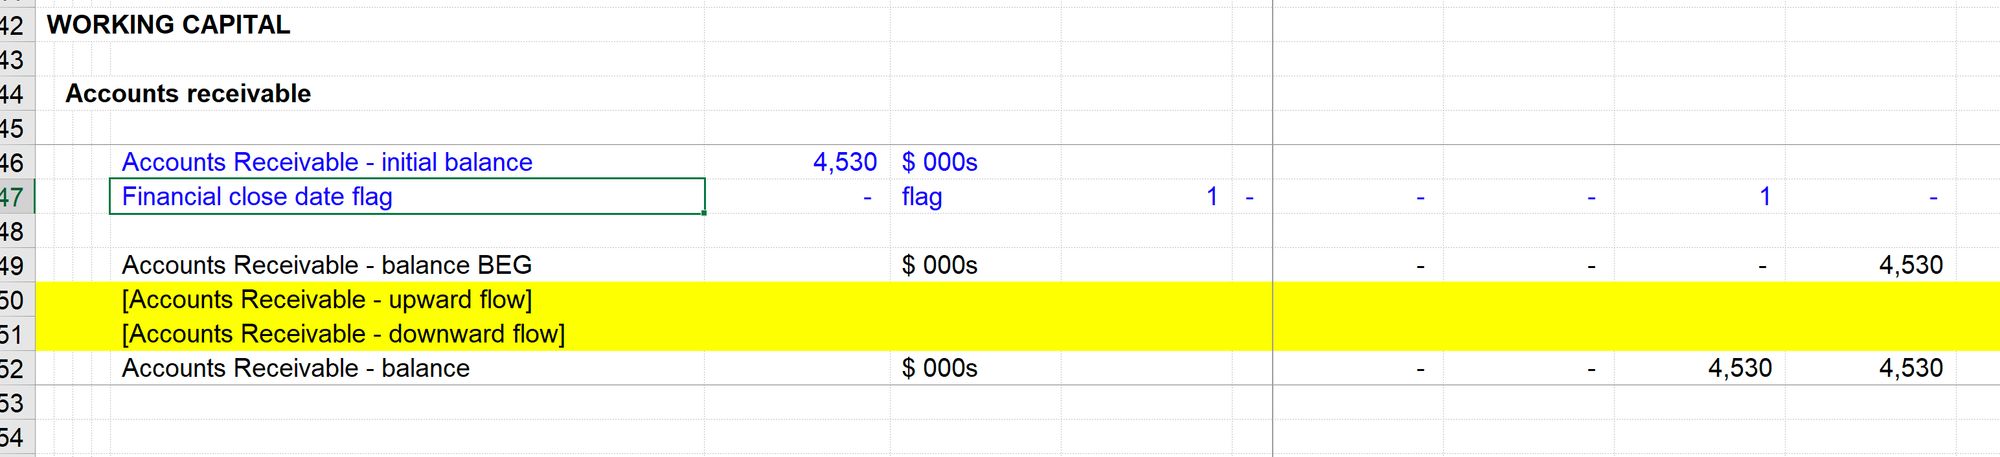
Step 5: Replace the timing flag placeholder.
Where a balance corkscrew has an initial balance, we want that balance to be injected at a point in time. We'd likely want to recognise the initial balance on the transaction date / financial close date in this example.
Therefore, we'd replace the timing flag placeholders with a link to the Financial Close date flag. Refer to Core Skill XX on creating a link.
Clear out the placeholder formatting with Ctrl+Shift+c from the Productivity Pack macros.
Step 6: Rename the upward and downward flows.
Each balance that you model will have its own flows that are relevant. In the case of Accounts receivable, the upward flow would be the issuance of invoices, which we have modelled as Electricity revenue. The download flow would be the cash received when these invoices are paid.
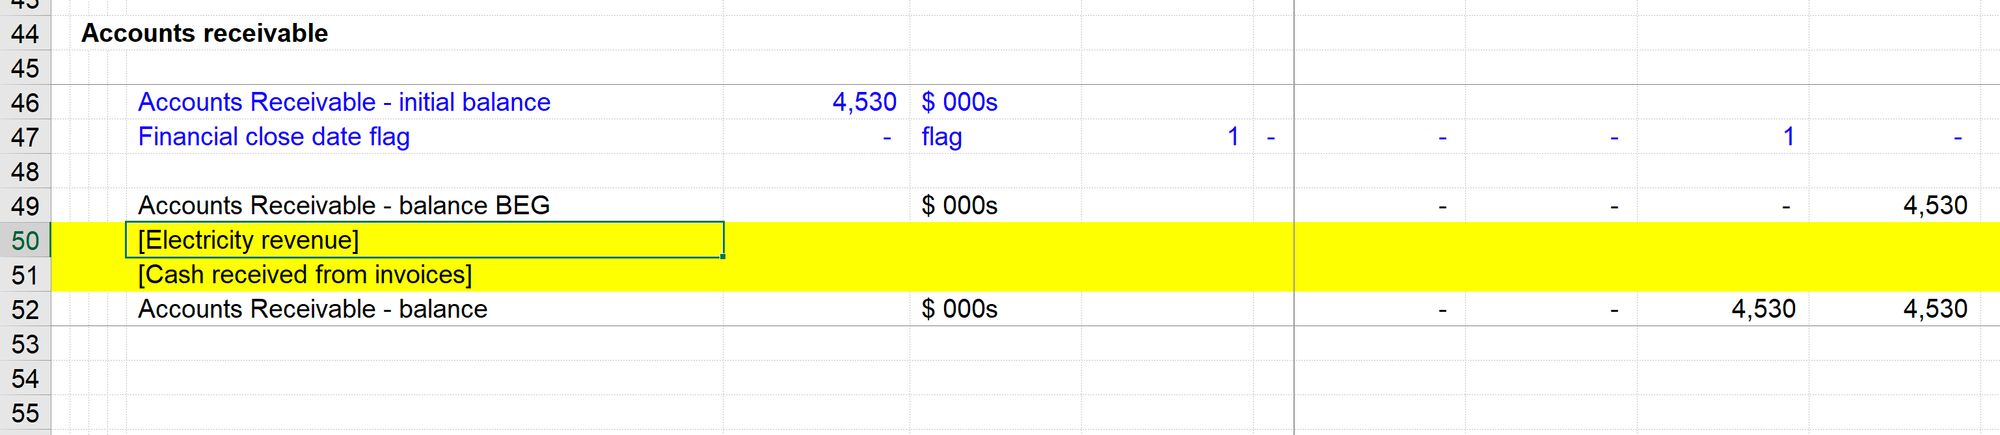
Step 7: Link any flows already modelled.
In our example, we can link revenue as we have already modelled that. We have not yet modelled the cash received, and so we'd leave this as a placeholder for now.

Option 2: Using template corkscrews.
Using template corkscrews was our preferred method before we added the automated corkscrew builder to the Productivity Pack. Whenever we needed a new corkscrew, we'd copy one of the template ones from the Tmp sheet. We'd then use Ctrl+h to replace the [xxx] in the labels. We generally do not use this method anymore.

Comments
Sign in or become a Financial Modelling Handbook member to join the conversation.
Just enter your email below to get a log in link.